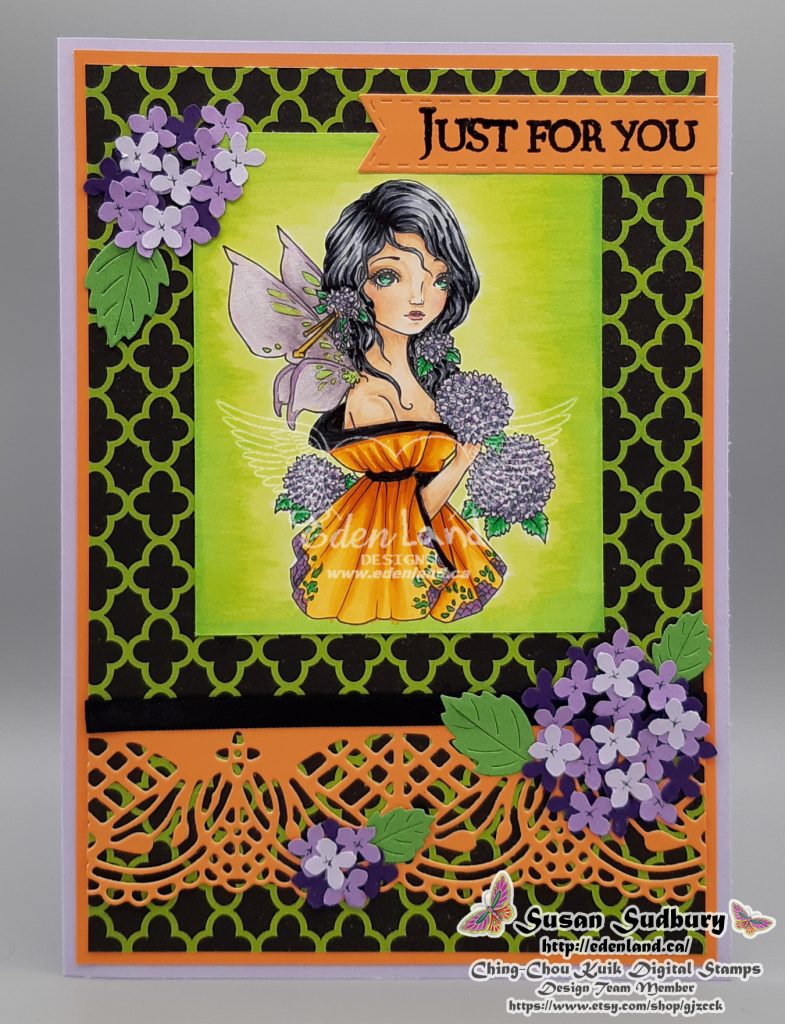
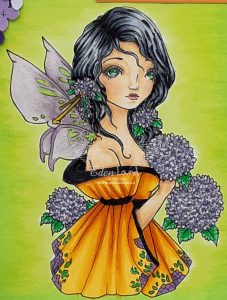
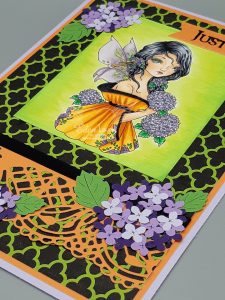
Hi there, and Happy Thanksgiving to all my Canadian friends 🙂 Today, I have my first inspiration card for this month’s Ching-Chou Kuik Facebook challenge. Our theme for October is Halloween/Halloween Colors/Pumpkins. I used Copics in the Halloween colors for this card, using the lovely image Luxury Purple.
I find that this palette gives a somewhat unexpected zing to such a feminine image! I chose the background paper from a Halloween paper pad that I have in my stash, then layered the image with a die cut lace border, edged in black ribbon. I stamped the sentiment, then cut it with a fishtail banner die. For the flowers, which mirror the blossoms in the image, I used an old Martha Stewart punch, and arranged them over some die cut leaves.
Hello there 🙂 I’m enjoying a few extra days off over the Canadian Thanksgiving weekend, so have some extra time to be crafty. Whimsy Stamps has an Inspired By Challenge, to celebrate World Cardmaking day, and I decided to jump in (I’m observing World Cardmaking Week, with my time off!) I was inspired by this amazing card by Iris.
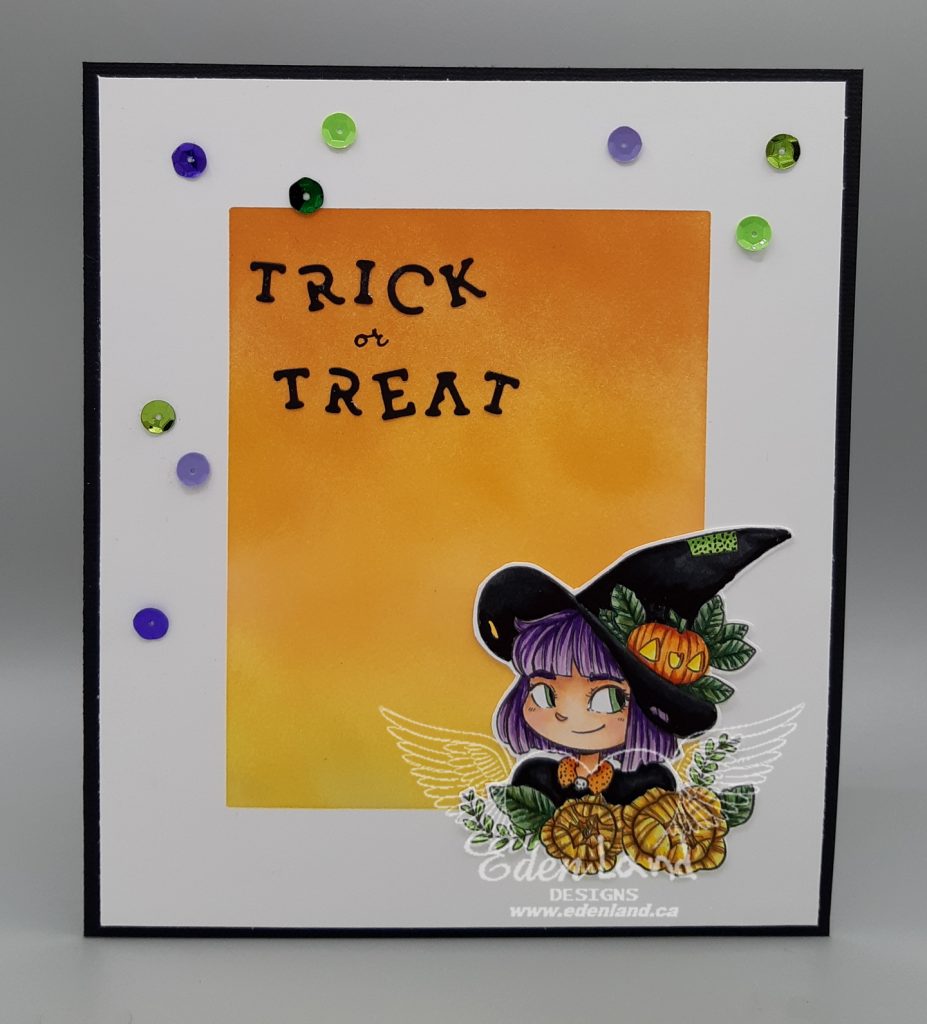
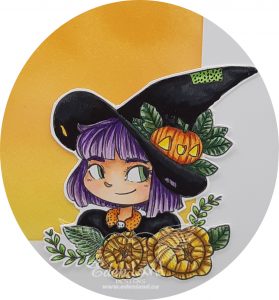
I went with the layout, and the masking, when I created this sweet Halloween card. I used sunset colors to make the rectangular base, then colored the cute Autumn Witch (a freebie from the past) with my Copics and fussy cut her out.
Although this particular image is no longer available, you will be spoiled for choice at the Whimsy Stamps store, no matter what holiday or occasion you’re creating for!
I die cut the letters for the sentiment, adding the “or” by hand, with a fine liner pen. A sprinkling of coordinating sequins finish this card off 🙂
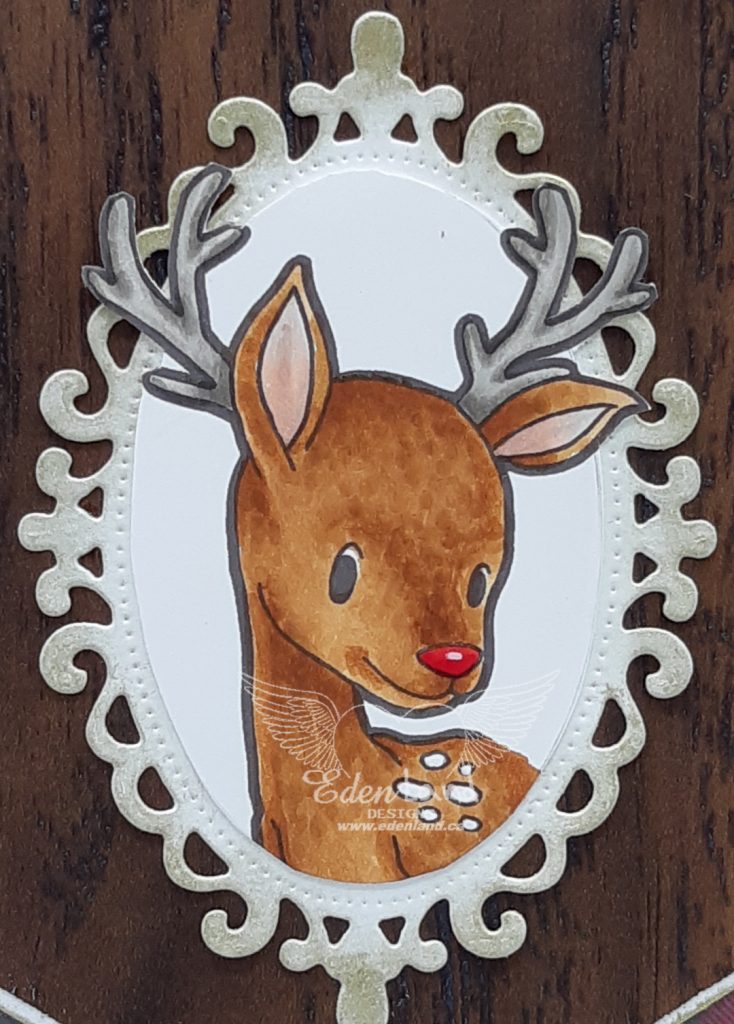
Hi there! Happy October 🙂 I’m here to share my project for the current ATG challenge at Creative Fingers. We are sponsored this time by Some Odd Girl, who have kindly provided the DT images to work with. I chose Sweet Deer, who could resist a little face like that??? I colored him up with my Copics, then mounted him on a die cut oval, that I’d edged with gold ink.
I wanted to make a rustic style card, so went with wood grain and buffalo plaid background papers! The woodgrain paper is actually a tissue type paper that the unassembled pieces of my coffee table were wrapped in!! As if I was going to throw it out!! I cut and layered the printed pieces and the image on white cardstock that I’d edged in gold. I used the same ink to add some shimmer to the die cut sentiment. A few antique gold metal embellishments provided the finishing touch.
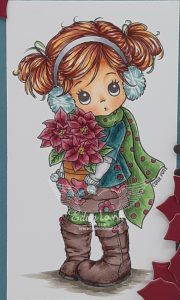
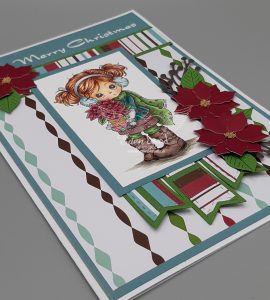
Hi there! I realized a while ago that I havent used a Conie Fong image for ages! So….I used the incredibly sweet Holly Poinsettia for this card 🙂 I colored her up with my Copics, matching the colors of my chosen papers as best I could.
After laying all the pieces out, and gluing them in place, I die cut and assembled the poinsettias, and arranged them around the image. I also cut some leaves and branches to tuck in. Some gold micro beads were used for the centers of the flowers. A stamped and embossed sentiment finished the card off.
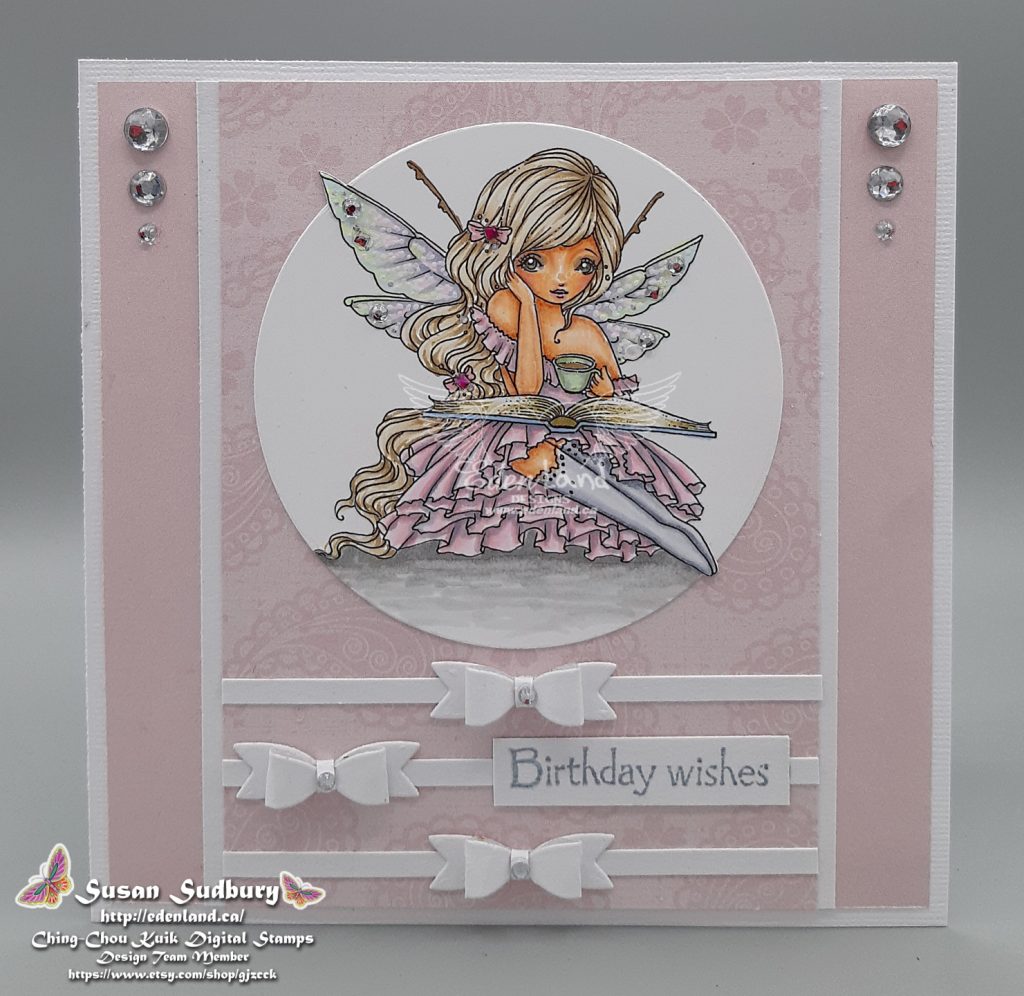
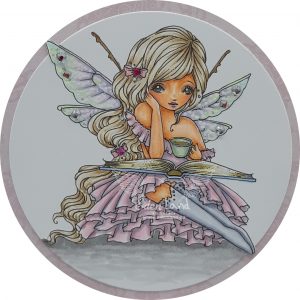
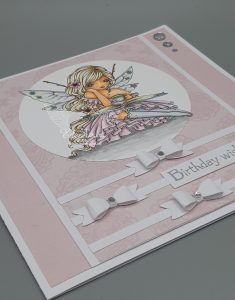
Hi there!! It’s hard to believe that September is almost finished, even though the leaves are changing, and fall is definitely in the air! I have my last inspiration for the month for the Ching-Chou Kuik Facebook Challenge. Our theme this month is Think Pink for Breast Cancer, but the DT was also Challenged to use something that starts with B this week. I used Bookworm Dollie, from this set, on my card. I colored her up with my Copics, sticking with the pink theme….and actually managing to pull off the pastels!
I went with a fairly simple layout, using 2 subtly printed papers, and white matting and die cut bows as contrast. The sentiment is stamped. I finished off by placing some gems in the corners, bow centers, and on the fairy wings. My B things are bows, bling, book, and beverage.
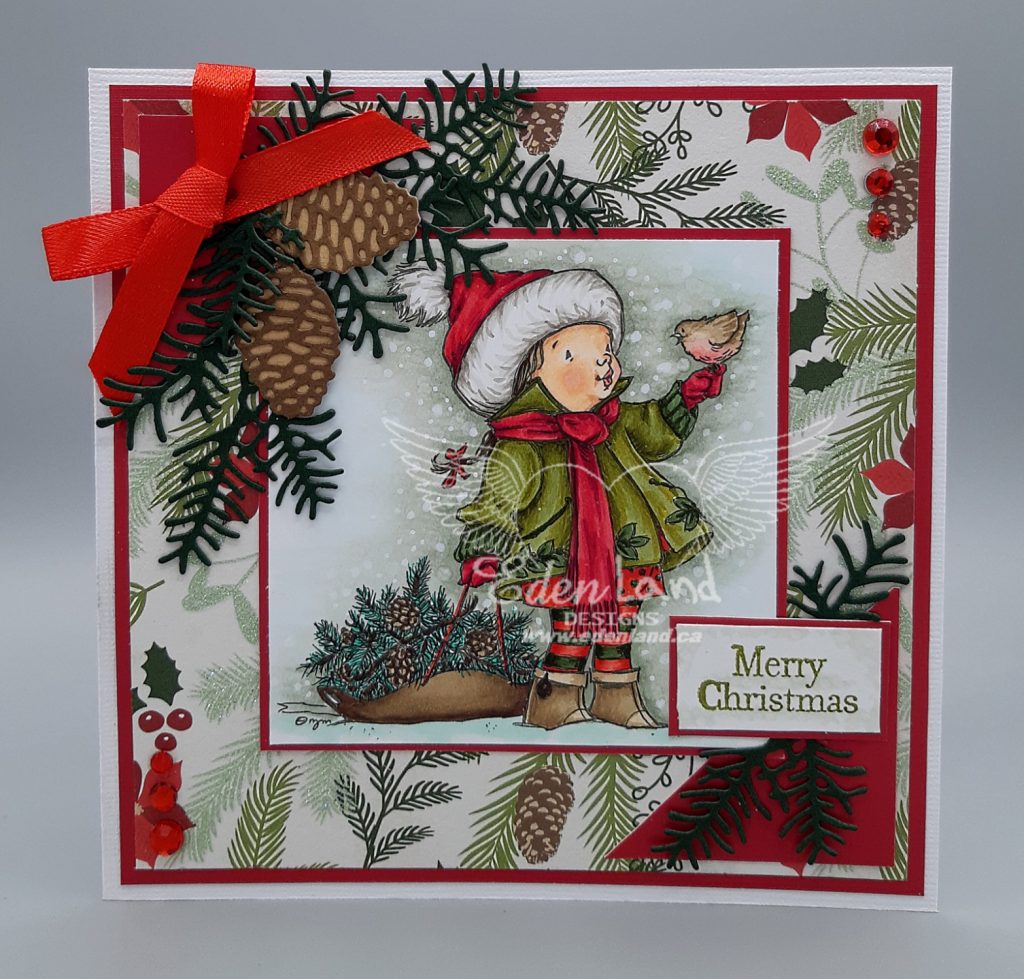
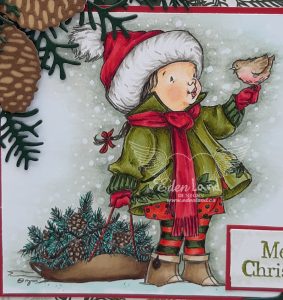
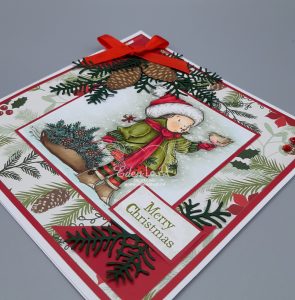
Hi there 🙂 Time for another Christmas creation…gotta keep myself on track here! I absolutely love Mo Manning‘s images, and this sweet one, Sharing a Song, is no exception! I chose my background paper before coloring, so I could match up the colors with my Copics. I added a snowy effect in the background with a white Posca, and my blender pen, then matted it in red.
I’ve had the pine bough and pinecone die for ages, sitting around in my stash, and I cant thing of a better card to use it on! I layered it over the contrasting triangular corner pieces, then added a pretty bow. I stamped the sentiment, then matted it with the same red paper that I used throughout, and added a few red gems to finish this sweet card off.
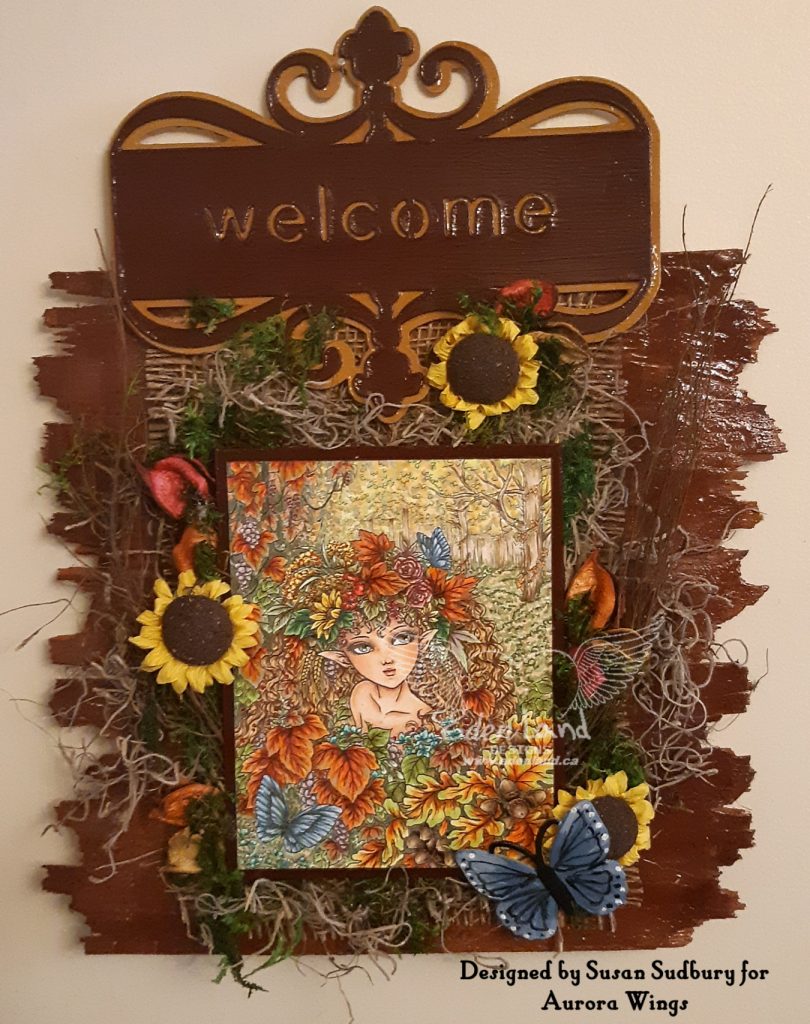
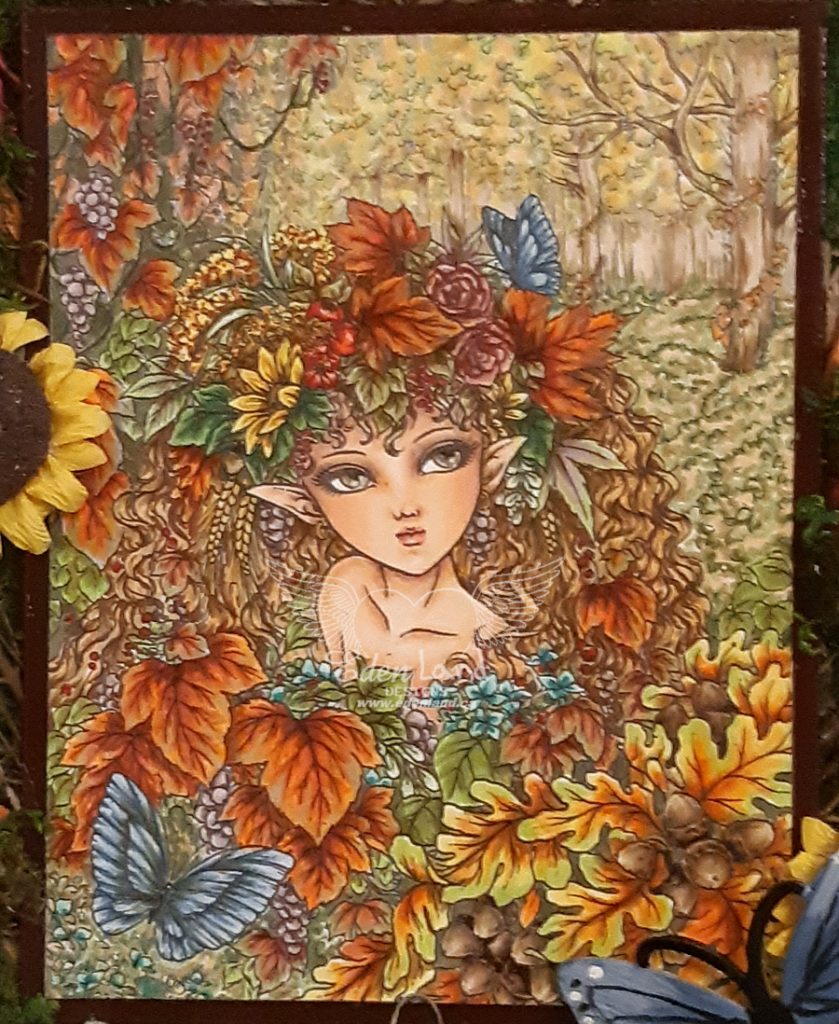
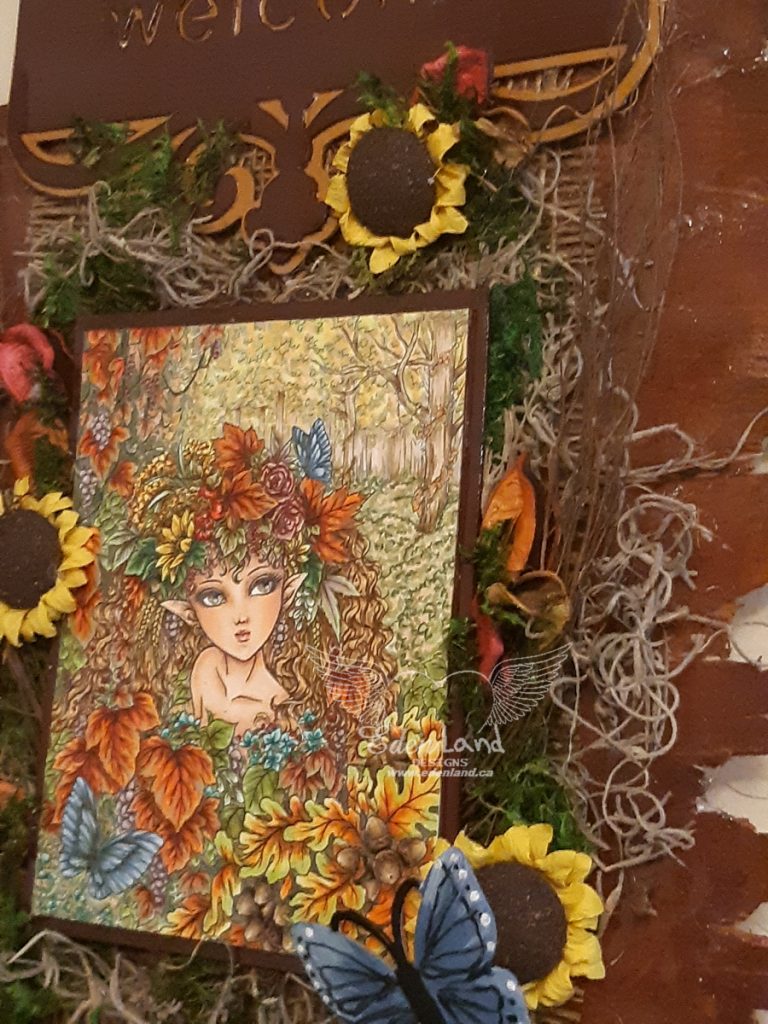
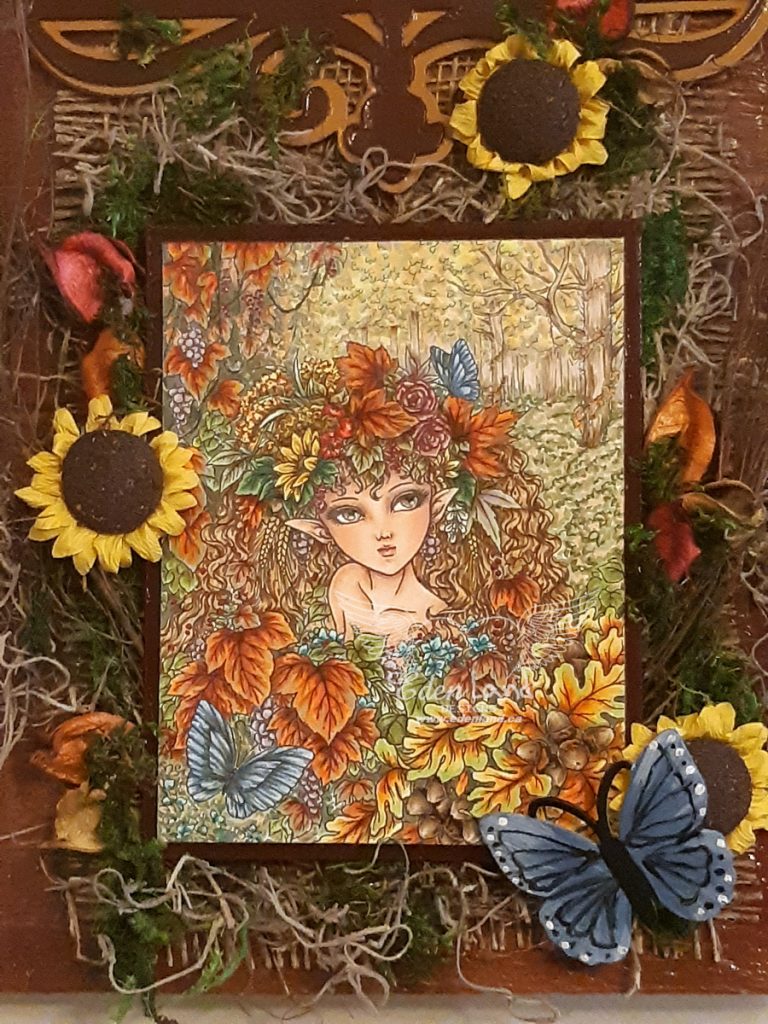
Hi there! I’m here to share my DT inspiration for this month’s ATG (old or new, and just colorings, too!) Challenge at the Stamps by Aurora Wings Facebook group. This was a project that I almost gave up on a few times! I used the amazing full version of Harvest Elf, from the Gardens and Goddesses 3 PDF coloring book. A simpler version of this beauty can also be found at the AW store. I printed the image waaay to small (3 1/5 x 5″), because apparently, I don’t value the remaining scraps of sanity that I’ve managed to hang on to. I colored it up with my Copics, trying to concentrate on individual elements as I went (this is the first time that I felt like giving up on this!)
When I FINALLY had her colored, I had no idea what to do with her! A friend suggested just framing her, but I had no frame the right size…..however….I was in need of an autumn themed decoration for my door! I scrounged around in my stash of stuff, and couldn’t find anything that would work (give up thoughts #2). I was just turning away from my closet of goodies, when these ugly crates caught my eye. I snapped them up years ago, when I worked at a department/grocery store. We had received cobs of corn in them, and they are made of cheap wood slats that are sloppily wired together. Definitely not something that is made to last! I’m sure that I got a few looks when I squirreled them into my car! I removed a few of the slats, and being cheapo wood, they splintered and broke….(thought 3)….but I worked with the mess I made and broke them more, and made a rustic base for my project. I painted it, then applied some crackle glaze on for a bit more texture.
While I was scrounging around for base material, I noticed a cut that I made eons ago on my Cricut. It was from a heavier weight plastic cardboard type of material, that pretty much screwed up my first machine! Good thing I saved it for all these years! I painted it, and adhered it to the wood base. I glued the image to a chipboard mat, then to some 1/4″ foam to lift it a bit, and placed it over a piece of burlap. Then I tucked 2 different kinds of moss and some twigs around it. I felt a bit of color was needed, so added a few sunflowers and some unknown nature thingies that I’ll call leaves. A chipboard butterfly, painted to match the ones in the image, was added as the finishing touch 🙂
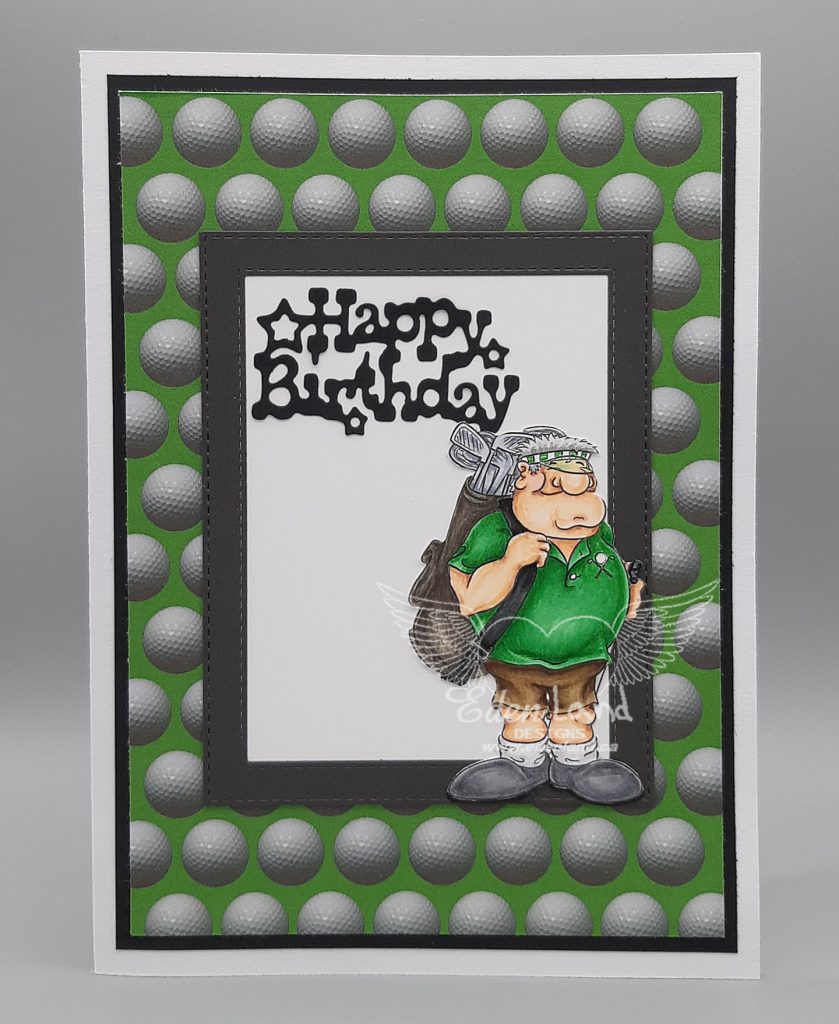
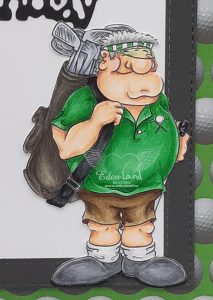
Hi there! A quick post to share a card that I made one of the guys from work. Guess what his favorite summer sport is? Lol. I thought that Hole In One Hal, from Doctor Digi, would be a perfect image to use! I colored him up with my Copics, then fussy cut him out.
I couldn’t believe my eyes when I went through my enormous paper stash, and couldn’t find an appropriate golf type print! So….I grabbed a golf ball image from a free site, and made my own background paper! I die cut a frame, and placed Hal on the edge, then cut a fun sentiment to finish this simple card off.
I’d like to enter this in the following:
Crafty Catz – #519 ATG with optional Make It Sporty
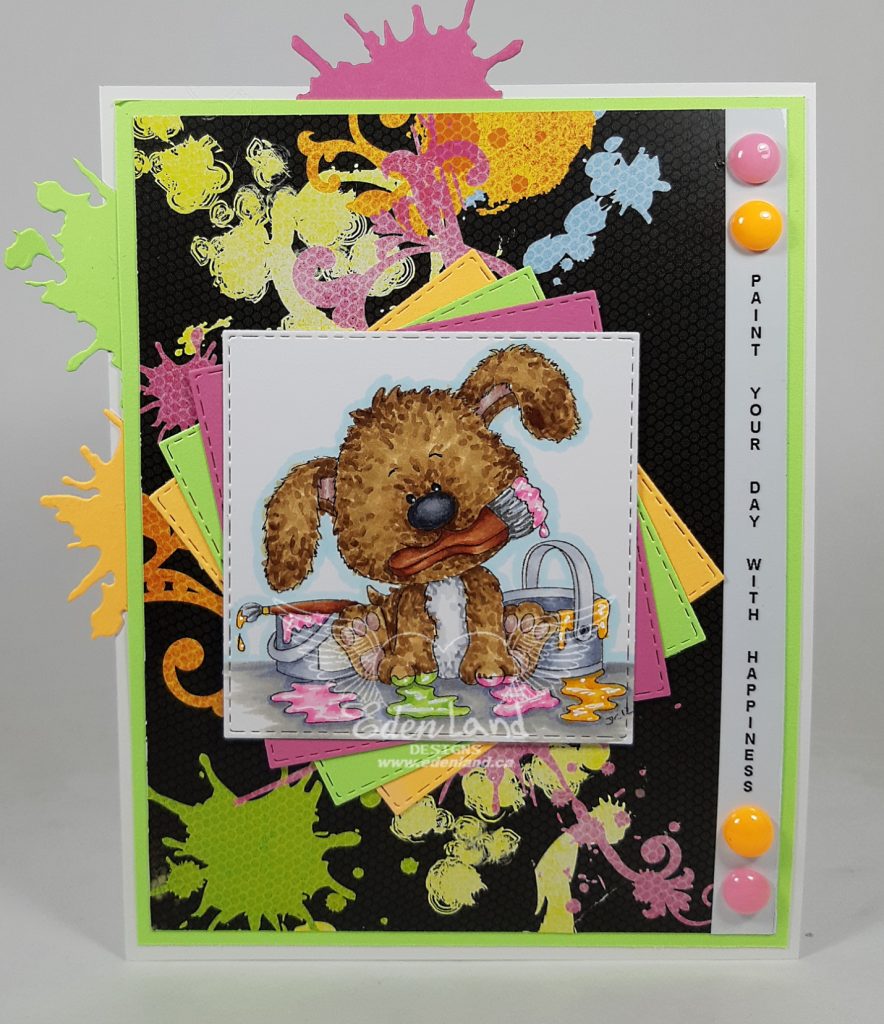
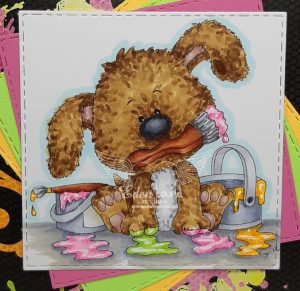
Hi there 🙂 I felt like doing a fun card, and decided to use DIY Pup from Di’s Digi Stamps. I colored him up with my Copics, trying to give his fur the same curly texture as my pup, Java.
When I colored the paint, I had the colors in this background paper in mind. I found some solid cardstock in coordinating colors and layered these pieces with the image. The ink, or paint, splotches on the paper made me remember this Tim Holtz die I have, so I die cut a number of pieces to tuck around the edges. I printed of the sentiment on my labeler, added a few melted pony bead embellishments, and the card was done, ready to be given to a Crafty friend on their birthday!
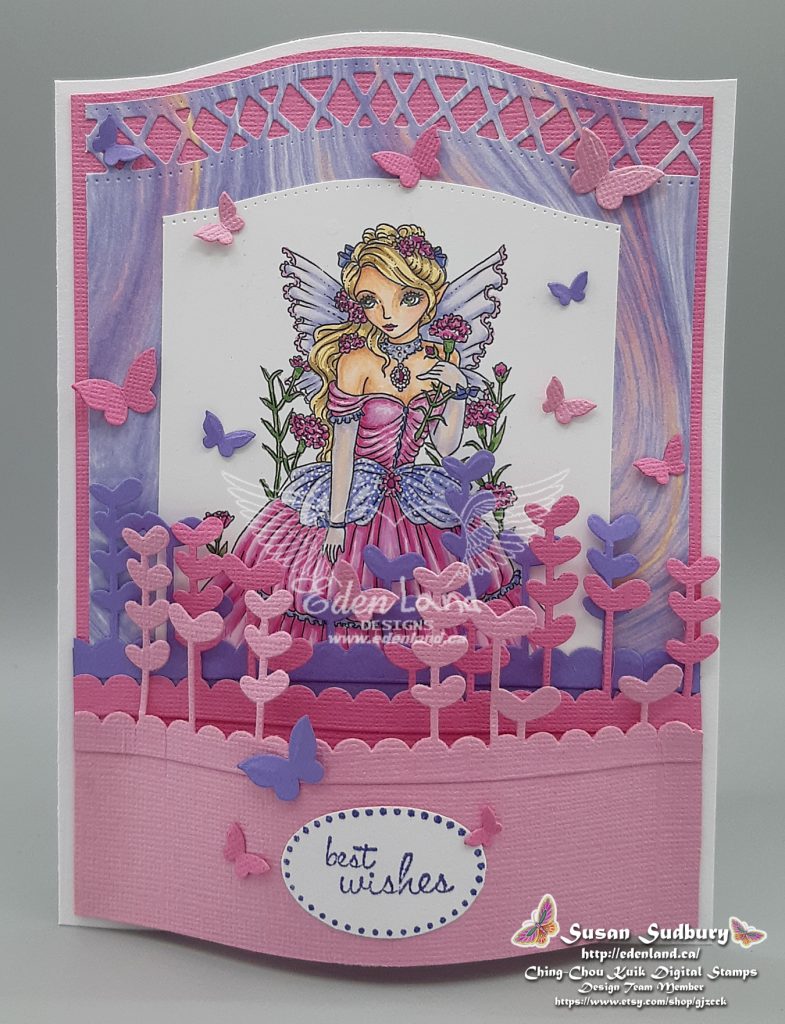
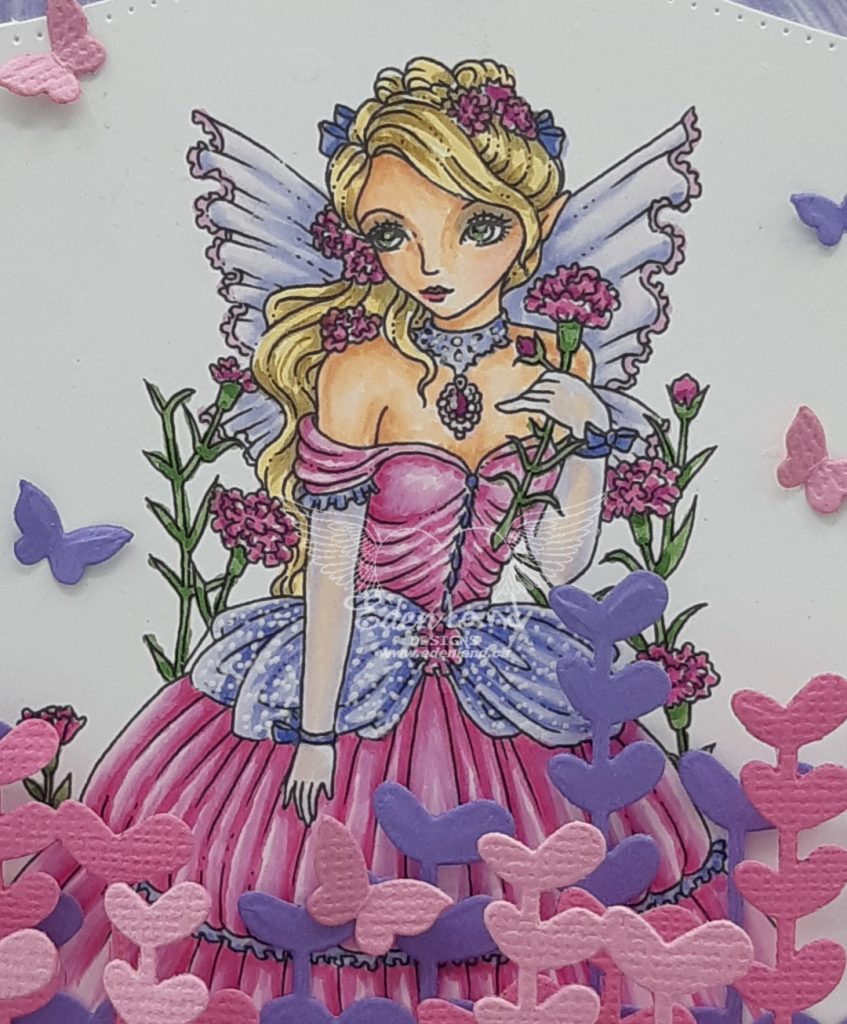
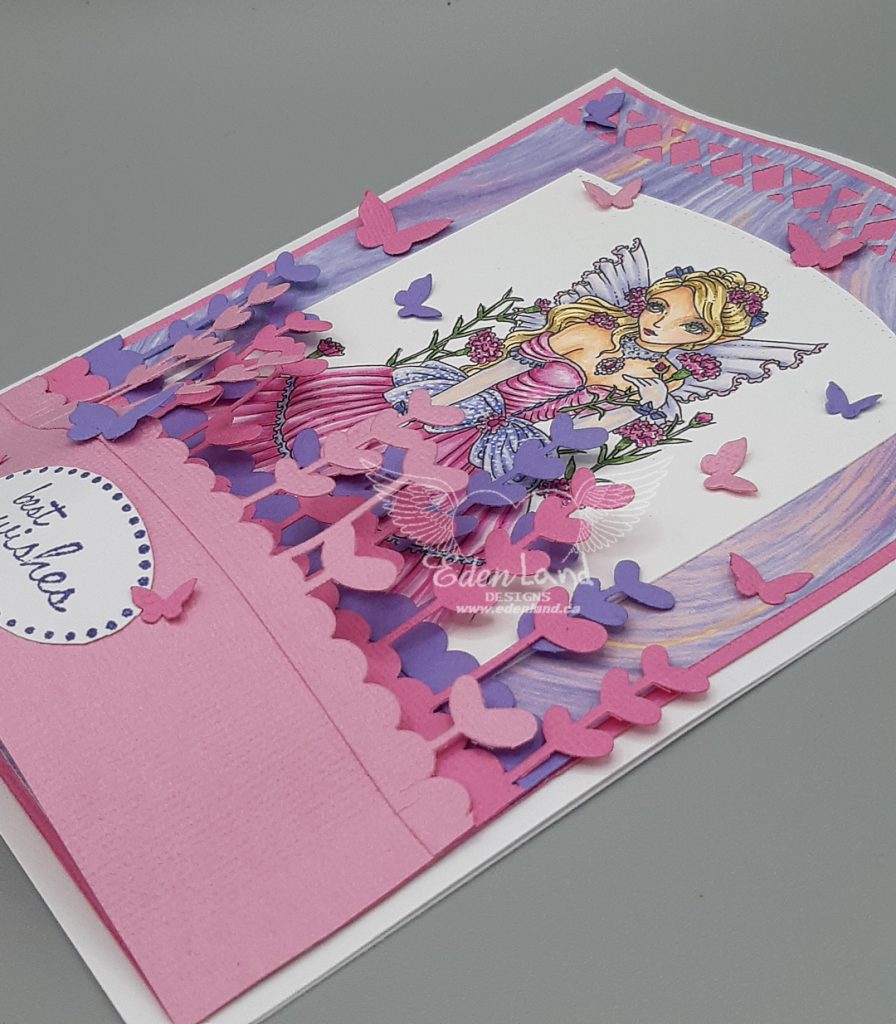
Hi there! It’s Sunday again, and time for me to share my second inspiration project for this month’s Ching-Chou Kuik Facebook Challenge. Our theme for September is “Think Pink for Breast Cancer “, but the DT had an additional challenge this week, and it’s to use decorative borders 🙂 I used the pretty image, Carnation Fairy, as the focal point of my card, and colored her up with my Copics, trying to match the colors in the papers I’d chosen before starting.
I knew which borders I wanted to use right from the beginning, so cut 3 of the flower butterfly borders from a Couture Collection die to form the base, and make it look as if she is taking a stroll through a garden. I also cut the curved trellis border at the top of the print paper, matching the shape at the top of the image, as well as on the card base. I assembled the bottom layers with a bit of a curve, using some foam strips to support the extended middle parts. The die has butterflies fluttering around it, so I used some of these around the image and the stamped sentiment.