Anniversary Bears

Good morning!! I just realized that the angle I took this photo (to compensate for the glare of the mirror card) makes it look a bit wonky, lol.  Anyhow….I’m here to share my inspiration for the new challenge over at C.R.A.F.T.   We have the theme of Valentines/Love this time around, and what’s more loving than an anniversary?  Our sponsor this time is the generous Crafty Sentiments 🙂

Prize is 3 digital images

I used the adorable image, Couples, from our sponsor, for my card.  I printed it on kraft card stock, and colored it with Prismacolor pencils.  After cutting it out with a circle die, I started layering it on various scraps of printed paper, which I had doctored up a bit 🙂  I used a heart background die to cut a sprinkling of hearts on one piece, and edged everything with some gold ink.  I scored the pretty black and gold lace at a dollar store recently, and this coordinated nicely with the sentiment, that was die cut twice….once from gold mirror card, and once from black card stock, to give it a shadow.  The corners needed a bit of something, so I die cut some hearts with the same background die, from the gold and black, and layered a few of the off cuts. I was happy with how it balanced things out 🙂  I hope you can join us this week with your LOVE-ly creations!!!

I would like to enter this in the following challenges:

Digi Choosday – Week 3 ATG

Lemon Shortbread Challenge – #59 ATG

Crafty Gals Corner – #157 ATG

Simon Wednesday Challenge – Add A Sentiment

A Year of Sprites

Weeeeee!!!  After 3 weeks of working on this, I’M DONE!!!! Ever since I was little, I grumbled about how July (my birthday month) always had ugly pictures in every calendar I looked at.  A few years ago, I decided to make my own calendars, doing up an image once a month….well, the farthest I ever made it was April, lol.  The challenge at Aurora Wings blog this time is Anything But A Card…and I came up with the brainwave to make a Sprite wall calendar 🙂  It was a lot of work, picking appropriate images for the months, coloring, cutting, figuring out layout, picking papers, more cutting, and finally dismantling an old notebook to retrieve the spiral, so I could hand bind it (NOT recommended!!).   I found this way different than making cards, as I had to make each page fairly light ie: no heavy embellishments, or the whole project would fall off the wall!!  There was a BIG oops along the way. One morning, while sitting at my table having coffee, with a bunch of colored Sprites in front of me, a sneeze came.  From nowhere. And I had my mouth full of coffee!!!! Coffee sprayed ALL OVER!!! I could have cried….but that evening I took a look, and saw that by fussy cutting the images out, I’d be able to salvage them!!  An extra, time consuming, step, but well worth the effort 🙂  So here goes my longest blog post (sorry) ever……

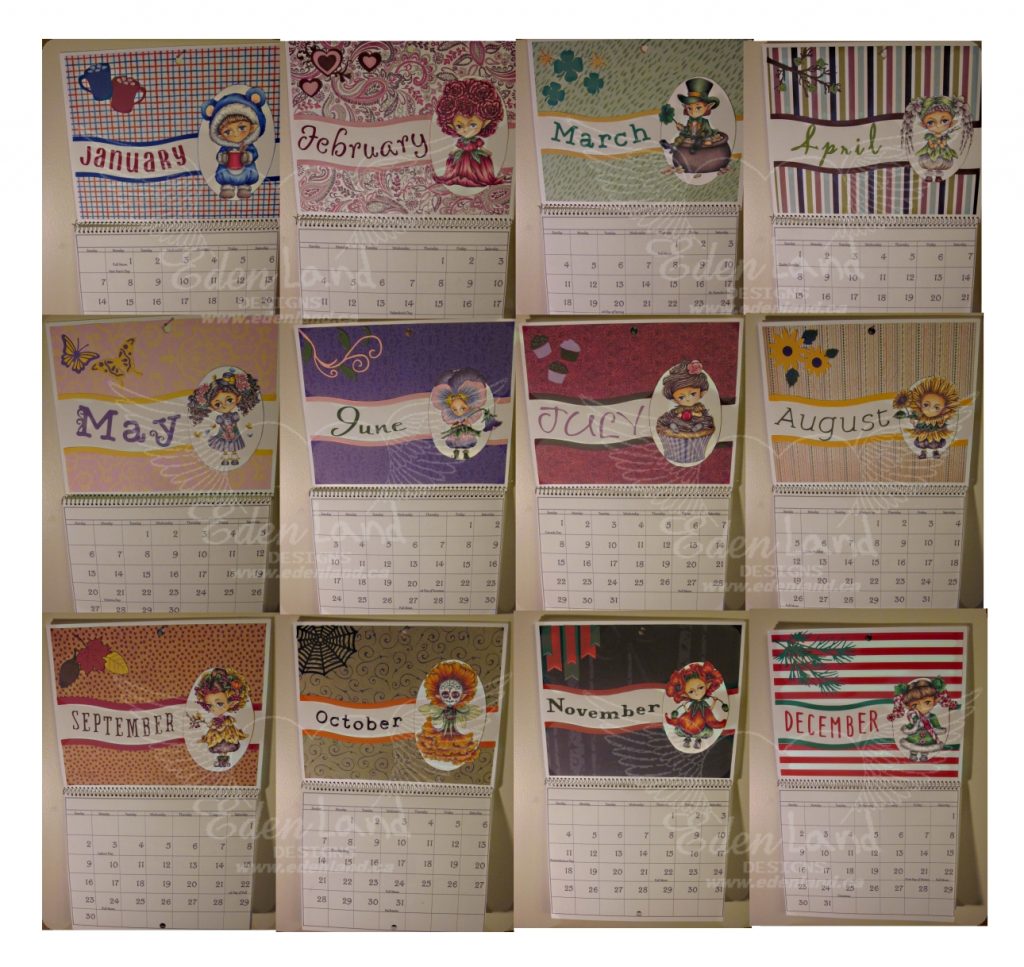
All the images were colored with SN and Copic markers, and all month names were cut on my Cricut.

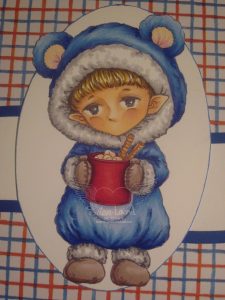
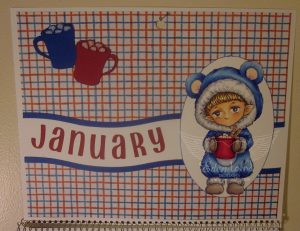
January:  Hot Cocoa Sprite.  The cold weather calls for a hot drink, and this sweetie fit the bill.  I found the mugs with marshmallows as a freebie stamp, and colored the marshmallows in a bit.

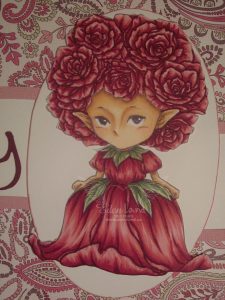
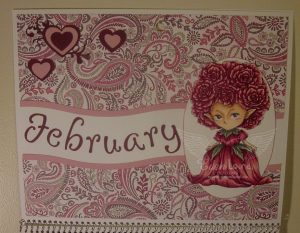
February:  Rose Sprite.  Valentines day calls for roses…and chocolate (but that will be another year!)  The corner hearts were cut with my Cricut 🙂

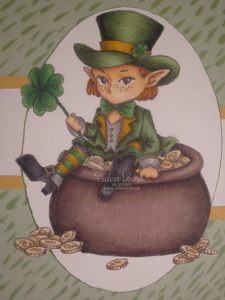
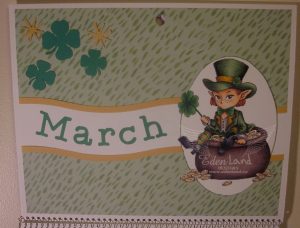
March:  Leprechaun.  March is the month to go for the green, and this little guy has hit the jackpot!! I drew the shamrock corner decorations, and cut them out, and added a few starry punched shapes as well.

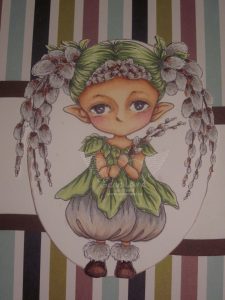
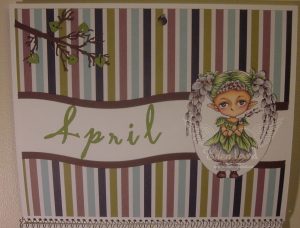
April:  Pussy Willow Sprite.  Here in Saskatchewan, Canada, pussy willows (finally) start to appear at this time.  The branch deco is cut with a Little B die, and the leaves are punched.

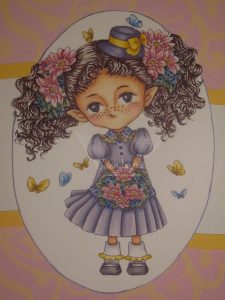
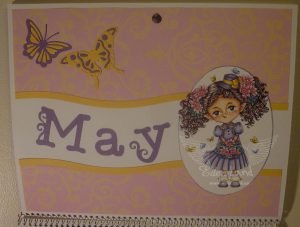
May: Spring Sprite without Bunny Ears.  By May, flowers are coming out, and everyone is beginning to feel a bit festive in the spring warmth 🙂  The butterfly decorations are inlaid die cuts made with Tattered Lace and another (??) die.

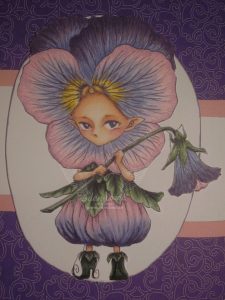
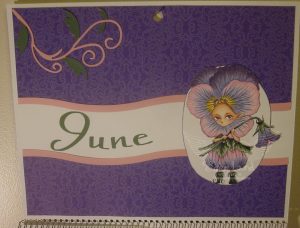
June:  Pansy Sprite.  June was my Mom’s birth month, and pansies were her favorite flower (mine, too); of course I had to use this Sprite for June!  I die cut the flourish corner with a Cheery Lynn die.

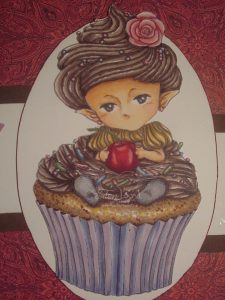
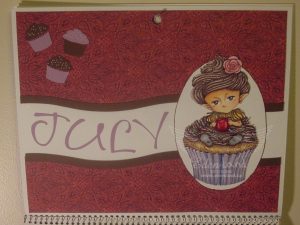
July:  Cupcake Sprite.  Finally July has an awesome picture 🙂  Since it’s my birthday month…of course I need cake!!  I punched the little cupcakes in the corner with a MS punch…and added some sprinkles to them 🙂

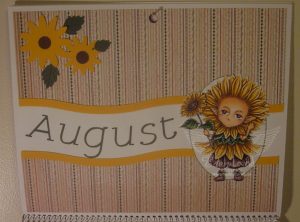
August:  Sunflower Sprite.  The end of summer is when the sunflowers seem to be the brightest and most cheerful, so I thought this Sprite was appropriate for the month.  I used my Cricut and a few dies to make the corner decoration.

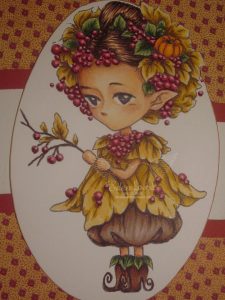
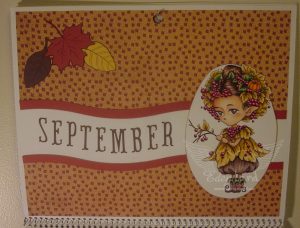
September:  Autumn Sprite.  Fall is setting in, and the leaves are starting to turn.  This beautiful image reflects the gorgeous season.  I stamped and cut out some leaves from a set from Inkadinkadoo.

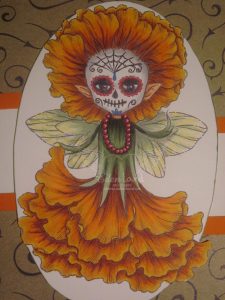
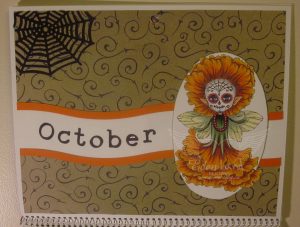
October:  Marigold Sprite.  There were a few choices for this month, but I had to go with this cutie…too pretty and cute to be scary!!  I die cut the spider web corner accent.

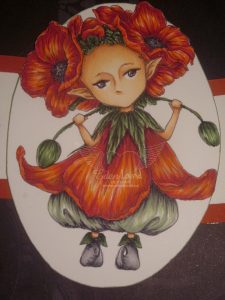
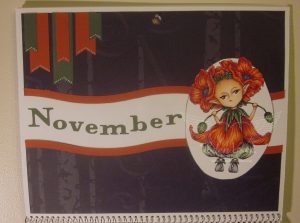
November: Poppy Sprite.  A perfect image for the month that Remembrance Day (here in Canada) falls in.  The banners in the corner were cut with 2 different dies, then cut to size.

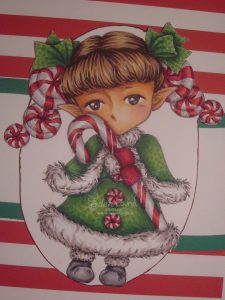
December: Candy Cane Sprite.  What an adorable way to finish the year off with!! Such a festive little Sprite, all ready for Christmas.  The pine boughs were cut with a Tim Holtz Sizzix die.

All said and done, I would only describe this as a labour of love. Thanks for taking the time to look at this!

And now…off to enter the Aurora Wings challenge – Anything But a Card. 🙂

I would also like to enter these challenges:

Work It Wednesday – December Use Something New…I used new dies, new images, and new markers 🙂

Classic Design Team Open Challenge – #21 January ATG

Polkadoodles Crafting Challenge – Week 2 ATG

Simon Wednesday Challenge – Use Patterned Paper

Cool Christmas Gift Card Holder

Hello there!! It’s not quite the middle of January, and I’ve already made my first Christmas creation for 2018!! Talk about getting a good start!!  Although I’d like to take credit for some forethought, I really can’t.  This is my DT creation for the new challenge over at C.R.A.F.T.  We have monthly Christmas themed challenges, to help everyone to prepare for the busy season.  This week, that’s exactly what our theme is 🙂  Our marvelous sponsor is All Dressed Up.

Prize is 2 images from the store!

I used Christmas Hair Do, from our sponsor, for my project.  I colored the cutie up with my SN and Copic markers, with a bit of sparkle on the snowflakes in the image.  Since I printed the image fairly tiny, I was a bit lost as to what to do with it.  I started playing around, and managed to invent a new background technique (I think…but there are so many talented people out there, I would think that someone else has done it!?!?)  I took a piece of felt and scribbled on it with my Copic markers in a few different blue shades.  I then used the Tim Holtz alcohol ink blending solution (since I have no blender refill 🙁 )  and put a few drops of this solution on the felt, over where I scribbled.  I then dabbed the felt around the image to make the background 🙂  Easy peasy, and since I didn’t get pictures…I was all alone, and didn’t know if it would work, lol …. I will have to do this again, and take some pictures of the process.  I cut everything out with a pretty square die and stamped and embossed a sentiment.  It needed a bit more, so I sprinkled some sparkly embossing powder over the background, and added a few silver sparkle ball embellishments.  After mounting it on some grey card stock to create the card, I decided to take it a step further, and make the card a gift card holder.

I enjoyed getting an early start on my Christmas makes for this year, and hope you can join us, and get a head start, as well!!

I’d like to enter this in the following:

Crafting From the Heart – #189

Stamping Sensations – January – Cold and Frosty Colors

Lil Patch of Crafty Friends – #73 ATG

Cupcake Inspirations – #437 Winter

Santa’s Gifts

When I make a Christmas card for a child, I’m always drawn to Santa images, as he epitomizes the magic of the season for the little ones.  That’s exactly what I did here, and chose Santa With Toys, from Whimsy Stamps.  I colored the image using my Prismacolor pencils, then cut it out so the red doily would peek out from behind.  I die cut a tree with a Little B die, and added some gingham ribbon and twine, tied at the side with a tree button.  The backing paper was perfect for this festive card for a very special child.  This went together so nicely, with simple embellishments that wasn’t “too much” for a kid to take in 🙂

I’d like to enter this in the following:

CraftyHazelnut’s Patterned Paper Challenge -January ATG With Pattern Paper

Whimsy Stamps Challenge Blog – #102 ATG

Penny’s Papercrafty Challenge – #361 ATG

Through the Craft Room Door – ATG Week of Jan. 2

Digi Choosday Craft Challenge – ATG Week 1

A Curious Christmas

How can anyone look at Curious George and not smile?? My 26 year old kid looooves George, so what else would I put on their Christmas card??  The only problem was, was finding an image!! I searched high and low, and finally found a kid’s coloring page on a free site that fit the bill to perfection 🙂  I shrunk it way down to card size and colored it up with my SN and Copic markers.  I partially fussy cut, partially die cut the image out, and framed it with a mirror card stitched die cut frame.  I went through my scrap bin and scrounged up some bright, festive scraps to arrange the image on.  The text background paper really added to the fun feel of the card.  I added some silver rivets to the corner to compliment the frame, then got it in the mail, special delivery, with love, to my kid, who, sadly, wasn’t able to spend Christmas with me.

I’d love to enter this in the following:

Pixie’s Snippets – Weeks 313 and 314

Lemon Shortbread Challenge – #58 ATG

Work It Wednesday – December 2017 Something New – Stitched Frame Die and Coloring Page

Crafting With An Attitude – #35 ATG


Valentine’s Box

Good morning 🙂  It’s a new year, and time for a new challenge over at the C.R.A.F.T. Challenge Blog 🙂  We have a fun theme this time, that might encourage you to stretch your creativity a bit and make a Box or Bag.  Of course, we have a fabulous sponsor, and they are:

3 sets of choice from The Cutting Cafe

I created my box with a template that I had on hand, and went with a Valentine’s theme…..what a change from all the Christmas makes lately!! I finally got around to getting replacement blades for my Cricut, so had some fun using the Paisley and Potpourri cartridges (yup, I’m old school and still love my cartridges 🙂 ).  I added some glitter glue to some of the hearts, and to the XOXO cut, and edged the box with some paper lace that I’ve had on hand for FOREVER!  A few shiny heart confetti pieces finish this box, ready for a Valentine surprise for someone special 🙂

Starry Reindeer

Well, this card made it’s way across the pond to it’s destination, so I can now blog it 🙂  I used on of Whimsy Stamps adorable images for the focal point of this.  Reindeer Magic was just too cute to resist, so I set to work, coloring him up with my SN and Copic markers, and adding gold Stickles to the stars.  Since it was going to be at the mercy of the postal system, I wanted to keep this card nice and flat….something I generally struggle with.  I matted the image with white, leaving a wide border down one side, that I went at with various star punches.  I layered all of this over gold sparkle CS, to pick up the glitter of the stars in the image.  Some pretty dimensional gold stickers provided the sentiment 🙂  The blue card base brings everything together, and this guy was in the mail!!

I’d like to enter this in the following:

Whimsy Stamps Challenge Blog – #102 ATG

2 Crafty Critter Crazies – #10 ATG with a critter

Creative Shopping Blog – #58 Everything Goes

ABC Christmas Challenge – A and B are for…..Antlers and Birds

Christmas Chihuahuas

I know I’m still blogging Christmas cards!!! With the flurry of the holidays, I just didn’t have time to share some of these 🙂  This one was specially made for the business that operates next door to the office I work at.  A few months ago, the owners mom and dad had to put down their old pup, and her dad was absolutely devastated 🙁  One day, she showed up at work with a crate (her dad works for her, and was busy in the shop).  Imagine the look on his face when he looked into the crate and saw a darling chihuahua puppy!! Cindy and her sister decided that a new baby would help to ease the pain of the loss of his old dog, and gave him the pup, who was promptly named Max.  Well, it was love at first site, and since then, Max has been coming to work 🙂  I’m generally not the biggest fan of chihuahuas, but this little guy is a sweetie!! Sooooo, what to put on their Christmas card?? Hehe, was there a choice?  Thank goodness Mitzi at Aurora Wings had this adorable image that she just came out with before Christmas!! I colored these cuties up with my SN and Copic markers, sticking with the fawn colors (like Max!!).  With it being a busier image, I wanted to keep the design of the card fairly simple, so I picked a patterned paper for the background and embellished with die cut pine branches (Tim Holtz Sizzix dies), and a pretty red bow.  Because it’s a Christmas card, and because I’m….well…..me…..I had to add a bit of sparkle on the branches with some Stickles 🙂  Oh, and they loved the card, by the way…..even Max seemed to like the fact that he got a starring role on it!!

I’d like to enter this in the following challenges:

Dream Valley Challenges – #169 Christmas

Digi Choosday Challenge – Week 1, ATG

2 Crafty Critter Crazies– #10 ATG with a Critter

Creative Craft Cottage – #102 ATG

The Sketchy Challenges – #133 Christmas

Christmas Couple

I’m a busy girl here, blogging all the cards that have made it to their recipients 🙂  This one was made for a special couple, whom are fantastic friends, and are like a second family to me <3  This image is from The East Wind, and can be found here.  I colored it with my SN and Copic markers, then cut it out with a stiched edge die.  I used a few scraps for the smaller strips of paper, and a rustic check paper for the background.  I cut some mistletoe,  with a Cottage Cutz die from some of the same paper used on the strip.  A piece of lace and a few pearls gave a nice bit of contrast to the plaid and muted colors.

I’d like to enter this in the following:

A Gem of a Challenge – #209 Anything Christmas Goes

The Sketchy Challenges – #133 Christmas

Winter Wonderland – Anything Christmas Goes

Crimbo Crackers – #148 ATG

Simon Wednesday Challenge – ATG


Pimpin’ Rudolf

I have loved this image “Rudolf’s Selfie“, from Sheepski Designs, since I first saw it.  He just looks so full of himself, that it makes me smile 🙂  I decided to use him to make a card for the artist that created him, Andrea, for Christmas this year.  Because it was being mailed overseas, I wanted to keep it flat to keep postage down, so I went with a CAS design.  I colored him up with my SN and Copic markers, then foiled his tooth with gold to give him a real “street” look.  I added the Ho Ho Ho sentiment with some gold stickers I had….it was nice to use up some of those spare letters from various sets, because I just can’t throw random stickers out (just in case, ya know!).  A few gold and red sequins for a bit more sparkle, and the card was ready to be sent off 🙂

I’d like to enter this in the following:

AAA Cards – #105 Sparkle

Simon Wednesday Challenge – ATG

Winter Wonderland – Anything Christmas Goes

The Sketchy Challenges – #133 Christmas

A Gem of a Challenge – #209 Anything Christmas Goes