Hi there!! Time is just whizzing by and I really had to push to get some of my end of the month projects done!!! This one features the beautiful Princess Alea, from the Leann’s World 101 Etsy shop. I colored her up with Copic and SN markers, then added glitter to her dress, crown and necklace. I tried to add some Wink of Stella to the bustle of her gown, but found that my WoS was empty….time to shop!! I have a huge pack of black and white paper in various designs, and as I was looking through it, I found the 2 that I’ve used on the card, which are opposite colors of each other 🙂 I matted everything with pink, before diving into my flowers to find the right shade!! I recently got a killer deal on some very pretty flowers at the dollar store, of all places….the big pink fluffy one is from some of my splurging, and the darker pink ones are from my older stash. I stamped and embossed a sentiment, then cut out the tag shape with a stitched die, and tied it with some pretty silver ribbon, to reflect the sparkle in the card. Loving how pretty and feminine this card turned out <3
Hi there 🙂 I went all girly with this card, but this sweet group of dance friends called for it!! The adorable image is from Lili of the Valley, and is called You’re A Star. I colored the image with my Copic Markers, then cut it out with a Xyron die. I found some pieces of coordinating DP in the scrap pile, and distressed their edges before layering up. The stars were cut with a Frantic Stamper star border die, that I used both the negative and the positive parts of. I’ve had the flowers for something like 10 years, as I received them as part of a swap when I was online swapping…and they became a treasured part of the hoard! The leaves were cut with a die from my stash.
I’m determined to get these cards that I’ve made recently blogged!!! This one features a sweet Sasayaki Glitter image, called Peggy Is In Love. This is also the featured image for the Sasayaki Glitter progressive challenge in their Facebook Group. I colored her up with my Copic and SN markers, then cut her out with a stitched die. I think it was her glasses that made me think she looked like a hippie girl….so I dug around until I found the paper pad with all kinds of 60’s Hippie prints 🙂 As you can see from my card, I had a very hard time deciding which prints to use, so went with as many as possible!!! I love the glitter touches in the background and some of the strips!! I edged a few of the pieces with white gel pen “stitches”. I heat embossed a white “Amigo” sentiment, and this card to send to a good friend was all done 🙂
A while ago, Mitzi, the genius behind Aurora Wings images, introduced this adorable Shamrock Sprite (Etsy) or (Aurorawings.com) 🙂 I just can’t seem to get enough of these fabulous whimsical little beings! I do cards for a nearby school’s social committee, and always need good bye and good luck cards at the end of the school year, so I like to be prepared, rather than turning into a crazed card-making machine in June!! This little sweetie was a perfect image for such a card <3 I colored her up with Copic and SN markers, then added some sparkle with a gold gel pen, and some gold inking on the distressed edges.
You can see the gold sparkle accents in her outfit in this close-up.
I went through my scraps of paper and found a few different greens to layer up on this card. I swear, the scraps seem to be reproducing overnight, as I thought I would see a lessening in the pile by now!!! I used some even smaller scraps to die cut a bunch of shamrock leaves, some of which I tied into a bouquet with a small white bow. For a sentiment, I turned to my Cricut, and the Essentials preloaded cut, and a piece of gold mirror card. To carry a bit more shiny gold through the card design, I used some gold studs that I purchased at a local sewing store.
I would like to enter this in the following challenges:
Hi there 🙂 How awesome is this image, that Twinkle Lane Designs was giving away in their Facebook Group a while ago! I colored it with Copic and SN markers, adding a bit of white gel pen on the glasses to show some shine. When I first saw the image, I knew which DP that I would use with it. I had this pretty sparkly piece of hibiscus print paper for a long time, waiting for the right image…and I think this is it 🙂 I layered it with a piece of bright pink CS, and die cut a banner. I fussy cut part of the image, so it over hung the die cut circle. The sentiment is comprised of a few letter stickers and the word “awesome” is from a die.
Good morning 🙂 I had a bit of an oops with dates, and this post is a day late for the new Sheepski Designs Facebook challenge!!! All of our challenges are ATG, but there’s always an optional twist, if you need a bit of direction, or help in choosing an image. This month, the twist is Use 2 Colors (other than black, white and skin). I used Birthday Cocktail, Image 28, on my card. It can be found at the Sheepski Designs Etsy Store, or you might be able to find it at our Facebook Group, as well 😉 If you’re shopping at the store, don’t forget to use this code, for a discount:
skisusan10
I colored the image with my Copics, then fussy cut it out. I embossed a plain white piece of CS, then layered a scrap of green and yellow paper with a window die cut out of it on top. I popped the image up in the window with some foam dots. I die cut multiple CHEERS out of yellow CS, and once out of green to give the word a shadow effect. After attaching the sentiment, I added a few yellow sequins for a bit of fun sparkle.
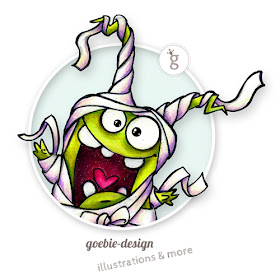
Hi there!! Thanks for stopping by, as I have a fun card here, for the new ATG challenge at Creative Fingers 🙂 We have a new sponsor this time, Goebie Design, who has all kinds of fun and quirky images to play with.
I was given Unicorn Donkey to use on my project. I colored him with Copics, adding a bit of gold glitter Nuvo drops to his horn. I die cut a number of stitched cloud borders, and inked them with some pastel colored Distress Inks. After layering them on a sky blue card base, I added the fussy cut image to look like he’s dancing in the rainbow clouds. My mind was going wild with sentiment ideas, but I finally decided on the jackass apology, with this on the inside:
I added a bunch of gold Nuvo drop accents amongst the clouds to finish the card off.
I think I could make a ton of these up to have on hand!! LOL I hope you can stop by and join our challenge, and while you’re there, check out the fun creations that the amazing design team has come up with!!
Hello! It’s hard to believe that we are 3/4 of the way through April already!!! Especially hard to believe for those of us that are still experiencing winter-like weather! No time to mope about it, though, because we have a fun new challenge for you at the Aurora Wings Challenge Blog!! For the next month, our theme is
Challenge 66 – Black & White with or without a Splash of Color
The design team has some amaaaaaazing inspiration pieces for you, so be sure to check it out and get some ideas for your own work of art!!!
I decided to do a wall hanging for my project. I used Princess of the Sea, which can be found at the AW Etsy Store here, and at Aurora Wings.com here. I cropped the image before printing it, then carefully drew in some droplets. I was going for the effect of a mermaid looking through a porthole….with color showing through the condensation droplets. Although I’ve done the dew drops before, my head was having a bit of fun getting around the color in just the drops. I messed around with 5 other of Mitzi’s mermaid images, and just could not make things work with them….my efforts actually ended up in the bin….and I NEVER throw anything out, lol. Finally, I got the old neurons clicking in some semblance of order, and, after figuring out what color the parts behind the water would be, I colored the drops in, then proceeded to color the rest of the image in the black and white tones.
I cut the “port hole” on my Cricut, from some black shimmer paper, and some plain CS to give it depth. I then dug through my brad bin (poor thing has been sadly neglected lately) and found a number of screw head brads to use on the port hole. I THOUGHT I had some black and white wood grain patterned paper, but I couldn’t find it in my mess, so used a print that resembled concrete, and added lines to make it look like old ship boards. I wanted the edges to be rough, so cut them with a few different edge scissors (talk about digging up the retro supplies, lol). After inking the edges, I got out my dies, and some black chalk board paper (it’s darker black than the plain black CS), and plain white CS. I cut a variety of vegetation and some fish with various dies from Frantic Stamper, Savvy Dies, and a few others that I can’t remember. I draped a piece of cheese cloth over the top, then positioned the diecuts to frame the image. To finish off, I added some white pearls, and some clear Nuvo drop accents. Black and white twine is used to hang this piece 🙂
After I got my head on straight, I had a ton of fun with this project!!! I really hope that you can get your black and white (and maybe a splash of color) on with us this month at the Aurora Wings Challenge Blog!!!
I’d like to enter this in the following challenges:
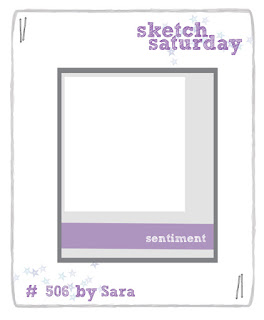
It will be a while before any gardening gets started around here, but these guys seem to be right into it 🙂 This image is from The Paper Shelter, and is titled Spring Elves. I colored it up with my Copic and SN markers, with a few touch ups in the clouds, after my blue markers decided to dry out!! 🙁 As it is a rather involved image, I chose to keep the paper patterns simple, and went with some DCWV sheets from a pad that I got recently. I die cut a small smile and brought out a bit more of the bright pink in the image with some Nuvo drop accents 🙂 I used this fabulous sketch at Sweet Sketch Wednesday 2 as my inspiration for the layout
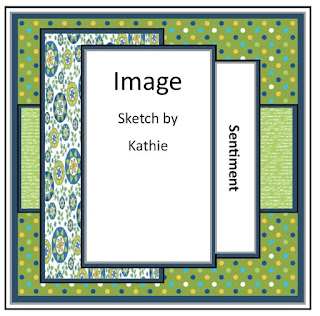
Hi there 🙂 I was sorting through my card stash, and found that I didn’t have any baby boy cards….here I’ve been stocking up on the girl ones, and no boy!! And just my luck, there will be a rash of boys born in the next little while, lol. I’ve had this image from Mo’s Digital Pencil for some time. I used the stippling effect with my Copic markers, to make Little Bear even fluffier than he normally is 🙂 I had a pad of papers that were free with a magazine years ago, and this circle print seemed like just the right thing for this card! I double cut a congrats sentment with a Tim Holtz Sizzix die, then arranged everything according to this super sketch at the Sketch Saturday blog